Night and Color
Taken from the assignment description; Taking photographs at night presents unique challenges. Exposure times must be very long, so hand-holding the camera is out of the question. However, with a steady place to rest the camera (which need not be a tripod), and long exposure, the light-gathering ability of your camera can greatly exceed the human eye, allowing you to capture a shot of something you could not normally see, such as a forest at night, a faraway galaxy, or even a rainbow cast by moonlight.
I will be honest here. Standing in a parking lot with a tripod-mounted camera that’s aimed at a building, at night, attracts unwanted attention. While trying to take the shot for requirement two, An Outdoor Night Scene of Architecture I was approached by security asking what I was doing. In one spot, I was simply asked to leave, which I did. But the result was anything I tried to do was rushed and accompanied by some anxiousness on my part. I think one of the biggest lessons I learned in this case, is you cannot expect to have a good shot in a rushed attempt. I think I did ok but I was still rushed and am left a little disappointed.
The Requirements
- Requirement 1: An Outdoor Night Scene of Nature
- Head outside, find somewhere stable to rest your camera, and photograph a picturesque natural night scene. We want to see absolutely no motion blur due to camera movement in your shot. You may wish to use the self-timer mode on your camera to avoid the problem of moving the camera when you press the shutter button. As this is a night scene, your exposure time should be at least one or two seconds. For this nature requirement, you may want to find a landscape illuminated by the sky and/or moon and/or artificial lights, but the subject should be nature (and not artificial objects). It’s okay if there is an incidental amount of manmade stuff in your scene, but your photograph should be all or almost all, natural, and the subject should clearly be nature.
- Requirement 2: An Outdoor Night Scene of Architecture
- As in requirement 1, take a night photograph of at least one or two seconds exposure with absolutely no motion blur, but this time your subject should be architecture. Example subjects include bridges, city streets, buildings, cityscapes, etc. Reminder: your photo should be well exposed, so we can see detail in the buildings and other objects — don’t make it so dark that all we can see are the lights.
- Requirement 3: Painting with Light
- Take a long-exposure photo in which you use a light source as if it were a painter’s brush. You should move the light around to create the scene you want over the course of the exposure. You can do this by making a moving light source the subject as in our example, or by pointing the light at the parts of the scene you wish to be illuminated over the course of the exposure. For example, you may want to walk around in your scene during the exposure with a hand-held camera flash, firing it in places you would like to be illuminated. In general, you may use any light source you have available to you: bike lights, LEDs, candles, flashlights, or even your cell phone screen will all cast light into the scene in different ways.
- Requirement 4: Light and Color
- Find a colored object and a strongly colored light source (such as an LED) such that the color of the object as photographed by your digital camera looks dramatically different under that light source versus under normal lighting. Submit two photographs demonstrating this effect – one under a normal lighting and one under colored lighting. Include in each photograph a white (neutral-colored) object as a comparison.
- To make the two photographs comparable, turn off the auto white balance on your camera. In your comments, describe the object and the colored light. Remember that this effect will depend not only on the apparent colors of the objects and light but on their underlying spectra. Since you don’t know these spectra, you may have to experiment a bit to find a good example. The effect will be strongest when using a light source with a narrow spectrum, such as the sodium lamps you find in parking lots or the LEDs on your electronics.
- Find a colored object and a strongly colored light source (such as an LED) such that the color of the object as photographed by your digital camera looks dramatically different under that light source versus under normal lighting. Submit two photographs demonstrating this effect – one under a normal lighting and one under colored lighting. Include in each photograph a white (neutral-colored) object as a comparison.
- Requirement 5: Color as a pictorial
- Take a photo that is primarily monochromatic (i.e. grayscale or a single desaturated color like grayish-brown) that has one or more elements sharing a single common bright color. For example, a black-and-white photo with three red apples. You can achieve the effect with any combination of setup and Photoshop, meaning that your original photo doesn’t have to satisfy the requirement as long as you use Photoshop to selectively saturate everything that’s not your color accent. Be creative here, and have fun with this one! Make sure you state in your comments how you set up the shot and what, if anything, you did in Photoshop to achieve the effect. (You don’t need to upload the pre-Photoshop shot, and again, you don’t necessarily even have to use Photoshop if you can achieve the effect without it.)
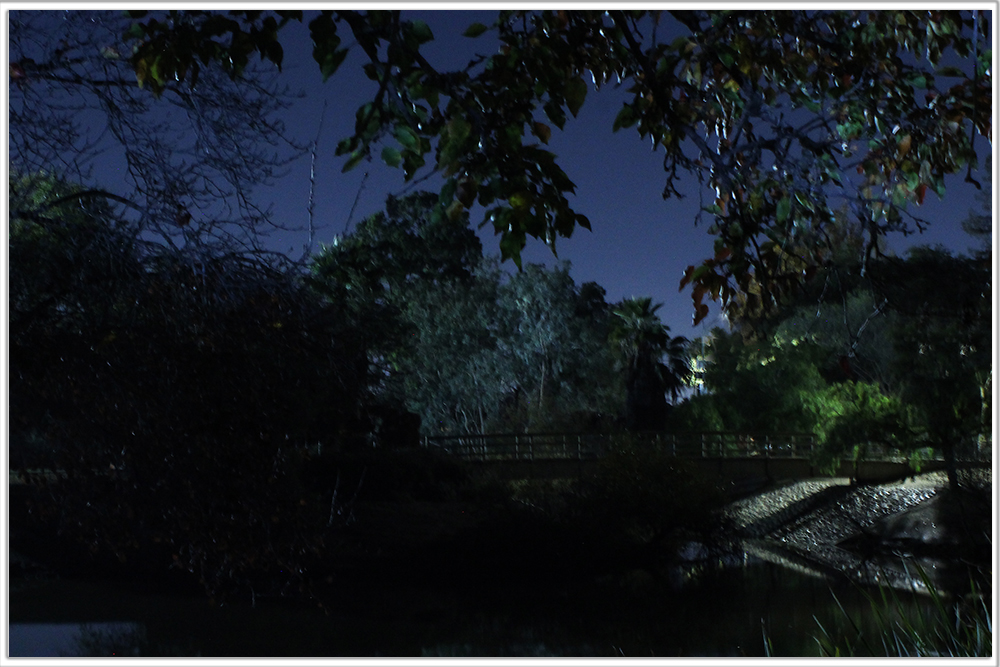
Requirement 1
An Outdoor Night Scene of Nature
- Exposure: F4.5
- Shutter Speed: 4 seconds
- ISO: 1600
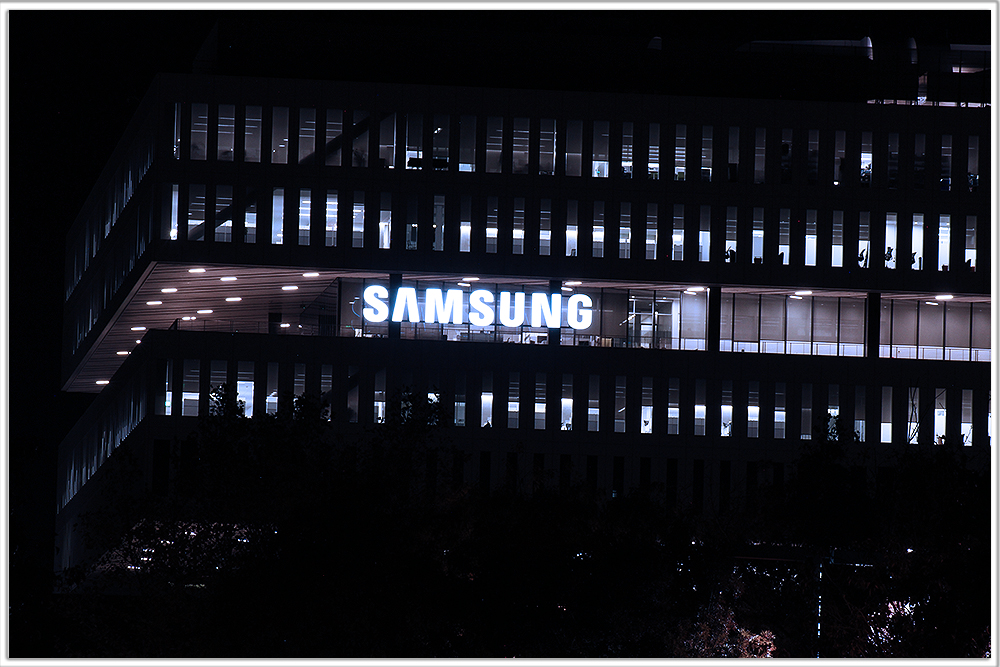
Requirement 2
Outdoor Night Scene of Architecture
- Exposure: F22
- Shutter Speed: 4 Seconds
- ISO: 400
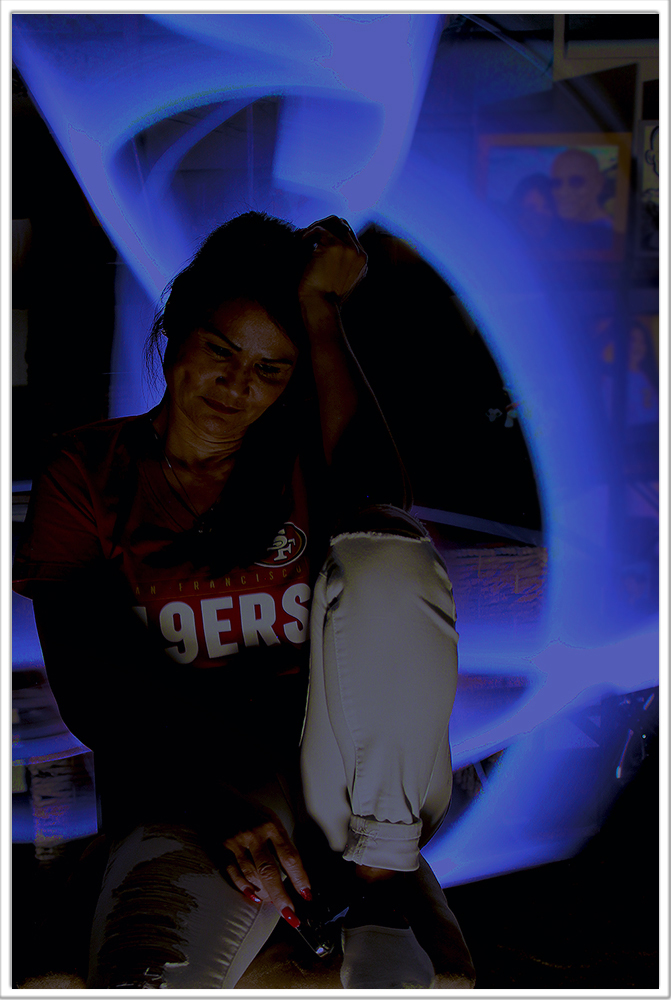
Requirement 3
Painting with Light
- Exposure: F8
- Shutter Speed: 8 seconds
- ISO: 100
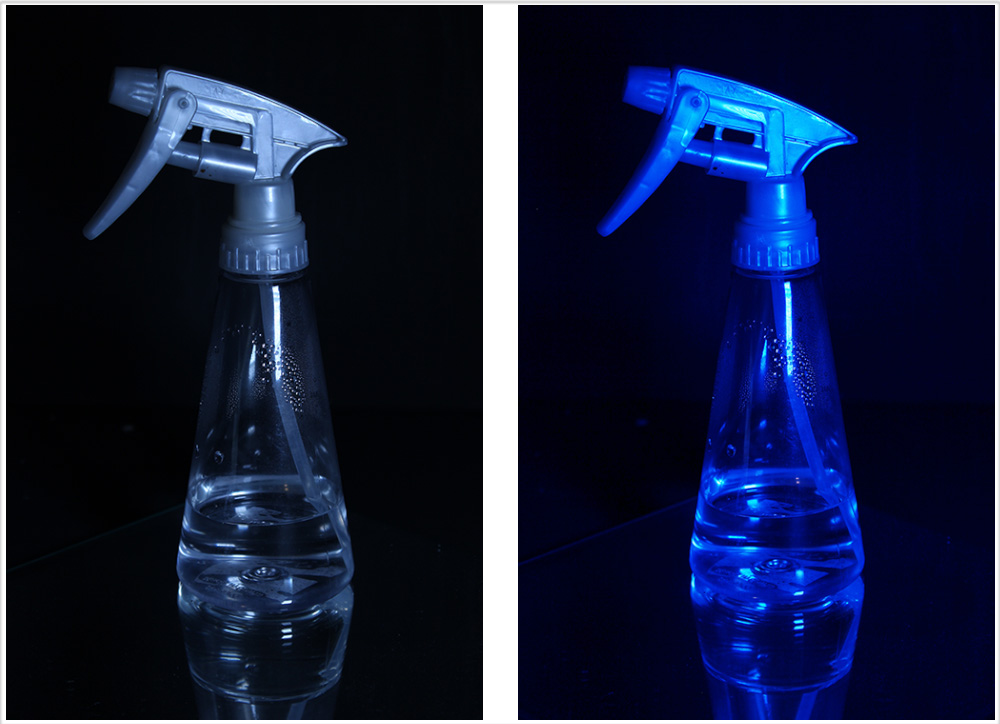
Requirement 4:
Light and Color
- Exposure: F5.6
- Shutter Speed: 1/60
- ISO 200
Lighting:
- White LED
- White LED with Blue cooling filter
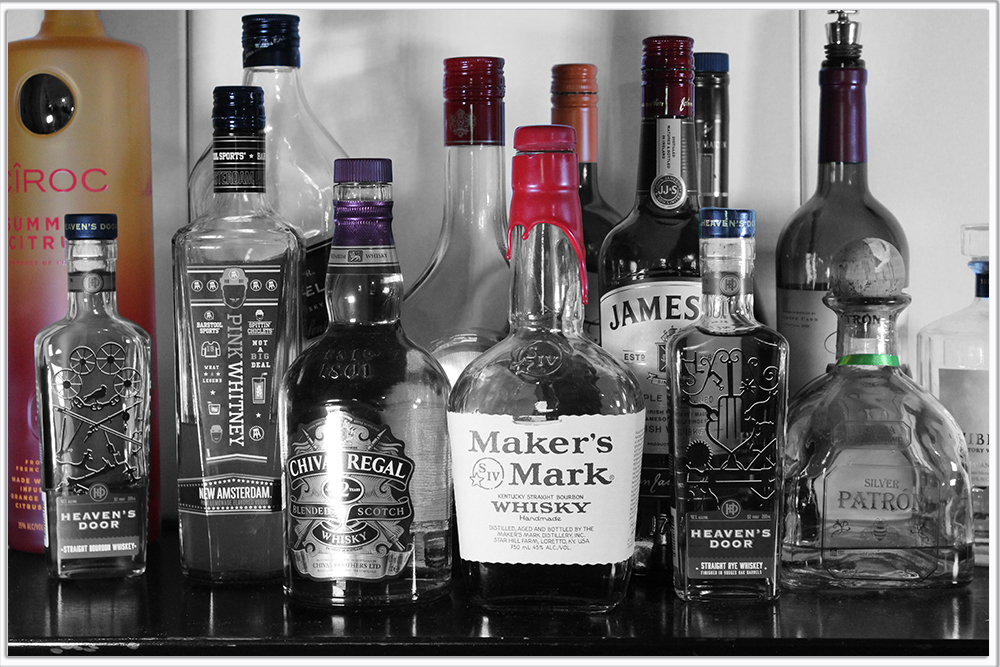
Requirement 5:
Color as a Pictorial
- Exposure: F4.5
- Shutter Speed: 1/60
- ISO: 1600
My Takeaway
Playing with a long shutter speed is a bit harder than I anticipated but something I definitely want to practice more. Pulling color that shines through black and white images is fun. Definitely more to learn about layer masking in Photoshop.
Onward!